

 Facebook
 X
X
 Pinterest
 Copy Link
8 Ways to Negotiate Repair Costs on a Home Sale Before Closing in Prescott, AZ

Buying a home in Prescott is an exciting milestone—but the stretch between an accepted offer and closing day is often when deals get complicated. Once the home inspection report lands in your inbox, you may be staring at a list of issues and wondering what to do next.
Here’s what I tell every buyer I work with: this moment is part strategy, part diplomacy, and entirely manageable—if you know how to handle it. Nearly 20% of U.S. home transactions fall apart at the inspection phase, most of them unnecessarily. With the right approach, you can protect your investment, keep the deal alive, and walk away with a home that’s worth every dollar you paid.
As a Prescott realtor, I’ve guided buyers and sellers through hundreds of these conversations. Below are eight proven strategies to negotiate repair costs before closing.
1. Know What the Prescott Market Is Telling You
Your negotiating power depends heavily on market conditions—and right now, Prescott’s market is giving buyers more room to work with than they’ve had in recent years.
As of mid-2026, homes in Prescott are sitting on the market for an average of 102 days, up from 85 days last year. The median list price has dipped slightly to $778,400, and homes are selling for roughly 1.95% below asking price on average. With 282 price-reduced listings currently active, sellers are feeling the pressure. That’s meaningful leverage for buyers heading into repair negotiations.
That said, market conditions can shift by neighborhood and month. Your realtor should be tracking the latest local data so you can calibrate your requests accordingly.
2. Focus Only on the Big-Ticket Items
No house is perfect—and trying to negotiate every item on a 60-page inspection report is one of the fastest ways to derail a deal. Sellers will tune out quickly if your list reads like a punch list from a renovation show.
Instead, use what I call the “Four S” framework to prioritize your requests:
- Safety issues: Faulty wiring, gas leaks, mold, or radon above EPA levels
- Structural problems: Foundation cracks, water intrusion, or roof defects
- Systems failures: HVAC, plumbing, or electrical systems nearing the end of their lifespan
- Significant costs: Any repair likely to run into the thousands of dollars
According to Opendoor, 83% of buyers use inspection reports to ask for concessions—but the ones who succeed focus their requests on items any reasonable buyer would flag. Cosmetic issues like scuffed paint or dated fixtures? Save those for after you move in.
3. Get a Contractor Estimate Before You Make Any Request
One of the biggest mistakes I see buyers make is submitting a repair request without any cost data to back it up. A vague request gives the seller too much room to downplay the issue or offer a token credit that doesn’t come close to covering the actual cost.
Before you present anything, get written estimates from licensed contractors. In Prescott, labor and materials costs can vary based on the scope of work and the contractor, so a real quote lends credibility to your request and gives both parties a concrete number to negotiate around. For HVAC, roofing, or structural work specifically, bring in a specialist—not just a general contractor—to ensure the estimate reflects the full picture.
4. Set a Repair Threshold
Rather than negotiating every line item, establish a dollar threshold—typically $500 to $1,000—and only request repairs or credits for issues that exceed it. This approach signals to the seller that you’re a reasonable, good-faith buyer focused on meaningful concerns, not trying to squeeze every dollar out of the transaction.
Sellers respond far better to focused, well-supported requests than to long lists that feel like an attack on their property. A targeted approach often gets you more in return.
5. Choose a Repair Credit Over Seller-Completed Repairs
Here’s one of the most valuable pieces of advice I give buyers: whenever possible, ask for a repair credit at closing rather than requesting the seller complete the work themselves.
A repair credit—sometimes called a seller concession—reduces your closing costs and puts money in your pocket to hire your own contractors after you move in. You choose who does the work. You set the quality standard. You get the warranty.
When sellers handle repairs themselves, they tend to move fast and choose the cheapest bid they can find. You’ll be living in that house—not them. Taking a credit puts you in control of the outcome and removes the risk of substandard work you’ll be dealing with for years.
6. Know Your Options: There’s More Than One Way to Negotiate
A repair credit is usually the most practical path, but it’s not the only one. Depending on the situation, you may want to consider:
- Seller-completed repairs before closing: Best for specific, well-defined issues—like a broken water heater—where quality is non-negotiable. If you go this route, require that a licensed contractor complete the work and that receipts are provided before closing.
- A price reduction: This lowers your loan amount but doesn’t give you immediate cash for repairs. Better suited for major issues where the cost is too high for a standard credit.
- A home warranty is useful as a supplementary ask, especially for aging HVAC systems or appliances. It won’t replace a failing roof, but it can provide a safety net for systems that may break down in your first year of ownership.
Many buyers combine these approaches depending on the specific issues at hand. Your realtor should help you identify the right mix based on the inspection’s findings.
7. Understand the Inspection Contingency Window—and Don’t Miss It
In Arizona, your purchase agreement typically includes an inspection contingency period, usually 7 to 10 business days from the inspection date. During this window, you have the right to submit repair requests. Miss the deadline, and you lose your leverage entirely.
Mark the date the moment you receive the inspection report. Work backward to schedule your contractor estimates, review the findings with your realtor, and prepare your written request with enough time to negotiate back and forth before the window closes.
It’s also worth noting that in Arizona, sellers are generally not legally obligated to make any repairs. However, if a buyer is using an FHA or VA loan, lenders may require certain repairs—such as addressing safety hazards or non-functioning major systems—before approving financing. If that applies to your transaction, those items should be addressed first.
8. Negotiate with Empathy, Not Demands
The tone of your repair request matters more than most buyers realize. Sellers—especially long-time Prescott homeowners—often have an emotional connection to their property. Many of the issues that show up in inspection reports are hidden beneath the surface: inside walls, under roofs, below the foundation. The seller may be just as surprised as you are.
Approaching the negotiation from a problem-solving mindset rather than an adversarial one changes the dynamic entirely. Present the data—contractor estimates, inspection findings—without accusations. Acknowledge that both sides want to get to closing. A collaborative tone typically leads to faster, more favorable outcomes for everyone involved.
Protect Your Investment Before You Close
Negotiating repair costs is one of the most financially consequential steps in any home purchase. Done well, it can save you thousands of dollars and prevent costly surprises after move-in. Done poorly, it can blow up a deal that should have closed without a hitch.
If you’re buying or selling a home in Prescott and want experienced guidance through the inspection and negotiation process, I’m here to help. Contact Kim Shaw today to talk through your situation—and make sure your next transaction goes exactly the way it should.
Kim Shaw
928-710-9148
Why Your Next Great Getaway Might Be Right Here in Prescott

When gas prices climb, the idea of a long road trip or a cross-country vacation can start to feel more stressful than relaxing. But here’s a little secret I’ve learned after years of helping people find their homes in Prescott: you don’t have to go far to feel like you’ve gotten away. In fact, some of the best escapes are waiting just outside your front door.
As a local realtor, I get to talk with folks every day about what makes Prescott such a special place to live. And honestly, one of my favorite things to share is just how much you can pack into a weekend without ever having to fill up the tank. So let’s plan your staycation together.
Start in Historic Downtown Prescott
There’s something timeless about strolling through downtown Prescott. The brick storefronts, the friendly faces, and that classic small-town charm make it the perfect place to begin your staycation.
Wander down Whiskey Row and soak in the history. These saloons have been welcoming visitors for well over a century, and the live music spilling out onto the sidewalk gives the whole area an easygoing, festive feel. Whether you stop in for a cold drink or enjoy the atmosphere, it’s a great way to spend an afternoon.
Right across the street, Courthouse Plaza is the heart of the community. Grab a coffee, find a shady bench under the tall trees, and watch the world go by. Throughout the year, the plaza hosts festivals, farmers’ markets, and concerts, so there’s almost always something happening.
Eat, Shop, and Explore Local Treasures
One of the best parts of a staycation is treating yourself like a tourist in your own town. Prescott makes that easy.
The local dining scene is full of surprises, from cozy cafés serving fresh breakfasts to family-owned restaurants dishing up everything from green chile to gourmet plates. Skip the chains and try a spot you’ve always wondered about.
Then there’s the boutique shopping. Downtown is packed with one-of-a-kind shops where you’ll find handmade jewelry, vintage finds, and gifts you won’t see anywhere else. Pair that with a visit to one of Prescott’s many art galleries, and you’ve got a day filled with creativity and discovery.
Get Outside and Breathe It In
Prescott isn’t called “Everybody’s Hometown” for nothing, but it could just as easily be called everybody’s playground. The natural beauty here is one of the biggest reasons people fall in love with the area.
Lace up your hiking boots and hit the trails. From the granite boulders of the Dells to the pine-shaded paths around town, there’s a route for every skill level. The fresh mountain air and wide-open views are the kind of reset we all need.
Love the water? Head out to one of our nearby lakes, like Watson Lake or Goldwater Lake. You can spend the morning kayaking across calm waters or cast a line and enjoy a peaceful afternoon of fishing. Pack a picnic, find a quiet spot in one of the local parks, and let the kids run free. It’s the simple stuff that makes the best memories.
Family Fun Without the Long Drive
Traveling with kids? Prescott has plenty to keep everyone happy. Family-friendly attractions, splash-worthy lake days, and seasonal events mean you’ll never hear “I’m bored” on your staycation. Check the local calendar before you plan your weekend, because there’s often a festival, rodeo, or outdoor concert ready to make your days even more memorable.
This Is the Lifestyle Prescott Offers
Here’s the thing I love most about my job: I’m not just helping people buy houses. I’m helping them step into a lifestyle. The kind of lifestyle where adventure, community, and natural beauty are always within reach, no matter what’s happening at the pump.
When you live in Prescott, every weekend has the potential to feel like a vacation. The trails, the lakes, the lively downtown, and the warm sense of community are all part of what makes calling this place home so rewarding.
Ready to Make Prescott Your Home?
If your staycation has you dreaming about putting down roots here, or simply finding a home that fits the lifestyle you love, I’d be honored to help. Whether you’re a longtime local ready for your next chapter or a newcomer hoping to experience all that Prescott has to offer, let’s find the perfect place for you.
Reach out today, and let’s start the search for a home that puts your favorite getaway right outside your door. Call Kim Shaw 928-710-9148
Why Prescott, Arizona, is the Ultimate Dog-Friendly Hometown

Dogs Welcome Here!
Moving to a new city means finding a place that feels like home for every member of your family. For dog owners, that means prioritizing neighborhoods with walkable streets, accessible green spaces, and a welcoming community. Prescott, Arizona, delivers exactly that. Nestled in northern Arizona, this vibrant town offers a lifestyle that both you and your canine companion will love.
Perfect Weather for Paws
Unlike the extreme heat of the lower deserts, Prescott enjoys a mild, four-season climate. This pleasant weather lets you comfortably exercise your dog outdoors year-round. Summer mornings stay beautifully cool, and the crisp autumn air brings out brilliant fall colors. Most importantly, you will not have to constantly worry about scorching pavement burning your dog’s paws during a midday stroll. The temperate climate makes daily walks a joy rather than a chore.
Trails and Tails: Endless Outdoor Adventures
Prescott serves as an incredible outdoor playground. With the vast Prescott National Forest right in our backyard, you and your dog have access to hundreds of miles of trails. You can take a leisurely walk around the stunning granite boulders of Watson Lake, or tackle a more vigorous hike up Thumb Butte. Adventure awaits just minutes from your front door. The varied terrain keeps every outing exciting and gives your pup plenty of new paths to explore.
Welcoming Parks and Patios
The dog-friendly culture here extends far beyond the wilderness trails. Prescott features several excellent dog parks where your furry friend can run off-leash and socialize safely. Willow Creek Dog Park stands out as a local favorite, offering separate fenced areas for large and small dogs, plus plenty of mature trees for shade.
After an active morning at the park, you can head downtown. Many local cafes and restaurants around the historic Courthouse Plaza gladly welcome dogs on their patios. This inclusive atmosphere makes it incredibly easy to grab a coffee or enjoy a meal without leaving your best friend behind.
Make Prescott Your Next Home
Finding a truly dog-friendly community makes settling into a new area an exciting experience. Prescott offers the ideal blend of comfortable weather, endless outdoor activities, and a community that loves its pets.
When you are ready to make the move, working with a local real estate expert ensures you find a property that fits your entire lifestyle. Whether you need a house with a spacious, securely fenced yard or want to live within walking distance of the best trailheads, I can help you navigate the local housing market. Let me help you find the perfect Prescott home for you and your dog. Call Kim Shaw 928-710-9148 for your next home for you and your dog!
What Is the MLS? A Guide for Prescott Buyers

If you want to buy or sell a home in Prescott, Arizona, you will likely hear your real estate agent mention three specific letters: MLS. You might hear phrases like, “I just put your home on the MLS,” or “Let me pull some MLS listings for you.”
But what exactly do those letters mean?
MLS stands for Multiple Listing Service. It is the most powerful tool in the real estate industry. Yet, many buyers and sellers do not fully understand how it works or why it matters so much to their transaction.
This guide explains exactly what the MLS is and how it works. We will also explore the different MLS systems across Arizona and explain how this vital database benefits you during your real estate journey.
What Exactly Is the Multiple Listing Service?
The Multiple Listing Service is a private, localized database created, maintained, and paid for by real estate professionals. It allows brokers and agents to share information about properties they have listed for sale.
Think of it as a highly detailed, cooperative catalog of homes. When a seller hires an agent to list their property, that agent enters all the property details into the local MLS. Other agents then use this database to find suitable homes for their buyers.
This system operates on a principle of cooperation and compensation. By listing a home on the MLS, a listing broker essentially offers a piece of their commission to any other broker who brings a buyer to the table. This collaborative approach ensures that homes receive maximum exposure and that buyers have access to all available inventory.
The MLS is not a single, nationwide database. Instead, it is a collection of hundreds of regional databases across the country. Each one serves a specific geographic area and operates under its own set of rules and regulations.
How Sellers Benefit
When you sell your Prescott home, your primary goal is to get the best possible price in a reasonable timeframe. The MLS makes this happen through massive exposure.
Once your agent enters your property into the system, it becomes instantly visible to hundreds of local agents who represent active buyers. Your home does not just sit in an office window; it actively broadcasts to the professionals actively searching for a property just like yours.
The MLS also syndicates your listing out to public real estate websites. This means entering your home into the local MLS automatically pushes your property data to sites across the internet. It ensures your listing details remain accurate, uniform, and up-to-date across all platforms.
How Buyers Benefit
If you want to buy a home, the MLS acts as your ultimate source of truth.
The MLS requires agents to update listing statuses within strict timeframes. This ensures you look at accurate, real-time data. You will know exactly what is available, what is under contract, and what has recently sold.
Furthermore, the MLS contains vital details that public sites often miss. Your agent can see the seller’s agent’s private remarks. These remarks might include showing instructions, details about necessary repairs, or information about specific property boundaries that public portals do not display.
Navigating Arizona’s Different MLS Systems
Because the MLS is regional, Arizona features several different systems. Real estate markets vary wildly from the cool pines of Prescott to the sprawling deserts of Phoenix. Therefore, local boards manage their own data to serve their specific areas best.
PAAR MLS (Prescott Area Association of Realtors)
If you buy or sell in Prescott, Prescott Valley, Chino Valley, or the Dewey-Humboldt area, the PAAR MLS is your primary database. The Prescott Area Association of Realtors operates this system.
The PAAR MLS tracks local nuances specific to the Quad-Cities area. It includes specific data fields for things like well access, septic systems, and mountain views. Because our local market differs from major metropolitan areas, having a dedicated, locally managed MLS ensures agents have the precise data they need to price and evaluate homes accurately.
ARMLS (Arizona Regional Multiple Listing Service)
ARMLS is the largest Multiple Listing Service in the state. It primarily serves the Phoenix metropolitan area, Maricopa County, and Pinal County.
Because many people relocate from Phoenix to Prescott, some crossover exists between these markets. Many Prescott agents maintain access to ARMLS to help clients who want to move between the two regions. If you plan to sell a home in Scottsdale and buy a home in Prescott, your agent might utilize both systems to coordinate your transition.
Other Regional Systems in Arizona
Arizona features several other regional systems that serve distinct communities.
- SVVAR (Sedona Verde Valley Association of Realtors): This MLS covers the unique red rock markets of Sedona, Cottonwood, and Camp Verde.
- MLSSAZ (Multiple Listing Service of Southern Arizona): This system serves Tucson and the surrounding areas.
- NAAR (Northern Arizona Association of Realtors): Flagstaff and the surrounding higher-elevation communities use this localized database.
A great real estate agent knows exactly which system holds the data you need. They pay membership dues to access these platforms so they can provide you with the most comprehensive market view possible.
The Power of Accurate Data
Real estate transactions involve significant financial investments. You need reliable data to make smart decisions. The MLS ensures that property descriptions, square footage, tax information, and homeowner association fees remain accurate and transparent.
Agents face fines if they enter incorrect data into the MLS. This strict enforcement creates a highly reliable environment. You can trust the information you receive, allowing you to move forward with confidence.
I Am Here to Help
Navigating the real estate market requires the right tools and the right expertise. The MLS provides the data, but interpreting that data requires a skilled professional who understands the Prescott area.
Whether you want to list your historic home downtown, search for a sprawling equestrian property in Chino Valley, or explore your options, we can help. We have direct access to the local MLS and the experience to leverage it on your behalf.
Do you have more questions about how the MLS works or what your home might be worth in today’s market? Reach out to me today. I would love to discuss your real estate goals and show you exactly how I can help you achieve them. Kim Shaw (928) 710-9148
Essential Moving Day Survival Kit Guide

Your Essential Moving Day Survival Kit
Moving into a new home brings a lot of excitement, but it also brings a fair share of chaos. When all your worldly belongings sit sealed in cardboard boxes, finding a simple roll of paper towels or your phone charger quickly turns into a frustrating scavenger hunt.
You can avoid this headache entirely by packing a moving day survival kit. Think of this kit as your lifeline for the first 24 to 48 hours in your new home. By keeping essential items easily accessible, you eliminate the stress of digging through a sea of boxes on your first night. Let us explore exactly what you need to pack to make your moving day as smooth as possible.
Why You Need an Open-First Box
Your moving day survival kit—often called an “open-first box”—should travel with you in your car, not in the back of the moving truck. This ensures you have immediate access to the things you need, regardless of when the movers finish unloading. Use a clear plastic bin or a brightly colored box so it stands out from the rest of your packed items.
What to Pack in Your Survival Kit
Building the perfect survival kit requires anticipating what you will need right away. Break your packing list down into these essential categories.
Critical Documents and Valuables
Never put important paperwork in the moving truck. Items get misplaced easily during the shuffle. Keep a dedicated folder with you containing:
- Moving contracts and estimates
- Lease agreements or closing documents for your new home
- Driver’s licenses, passports, and social security cards
- Medical records and prescription information
- Valuable jewelry or small family heirlooms
Cleaning Supplies and Tools
Before you start unpacking, you may want to wipe down counters or assemble a bed frame. Having basic tools and cleaning items ready will save you hours of frustration.
- Paper towels and toilet paper (pack at least two rolls)
- All-purpose cleaner and trash bags
- A multi-tool or basic toolkit (screwdriver, hammer, pliers)
- Box cutter or scissors to open other boxes
- Hand soap and a dish sponge
Personal Toiletries and Medication
After a long day of lifting boxes, you will want a hot shower and a good night’s sleep. Pack a small overnight bag for each family member.
- Toothbrush, toothpaste, and deodorant
- Shampoo, body wash, and a towel
- Any daily prescription medications
- Over-the-counter pain relievers (for those inevitable moving day aches)
- A change of clothes and comfortable pajamas
Food, Hydration, and Utensils
Moving requires a lot of energy, and you will not want to cook a full meal on your first night. Pack provisions to keep everyone fueled.
- Bottled water or reusable water bottles
- Easy-to-eat snacks like granola bars, mixed nuts, or trail mix
- Paper plates, plastic utensils, and cups
- Coffee maker, coffee grounds, and a mug for the next morning
- Pet food and bowls if you are moving with furry friends
Electronics and Chargers
Staying connected is vital on moving day. You need to coordinate with movers, update family members, and maybe order a pizza for dinner.
- Phone chargers and charging blocks
- A portable power bank
- Laptop or tablet (and their respective chargers)
- A small Bluetooth speaker for unpacking music
Tips for a Stress-Free Moving Day
Preparation goes beyond just packing the right items. Follow these organization tips to keep your stress levels low:
Start Early: Begin packing your survival kit a few days before the actual move. As you pack up the rest of your house, set aside the essentials so they do not end up on the moving truck by accident.
Label Clearly: If your survival kit spans more than one box, label each one boldly on all sides. Write “OPEN FIRST – KITCHEN” or “SURVIVAL KIT – BEDROOM,” so anyone helping you move knows exactly where to place them.
Plan for the Kids: If you are moving with small children, create a dedicated kit just for them. Include their favorite toys, pajamas, a comforting blanket, and some snacks to keep them occupied and happy while the adults handle the heavy lifting.
Ready for a Change of Scenery?
Moving takes work, but stepping through the front door of a home you truly love makes every moment of packing worth the effort. By preparing your moving day survival kit, you set yourself up for a successful, organized transition into your next chapter.
Are you thinking about making a change? Whether you are looking for more space, a new neighborhood, or your very first property, you need an experienced guide by your side. Give Kim a call at 928-710-9148 today when you are ready to make a move and buy a new home!
Smart Ways to Boost Your Home Value on a Budget

It happens to everyone. You look around your house and start seeing dollar signs—not in terms of wealth, but in terms of repairs. Maybe you are thinking about selling soon, or perhaps you want to build some equity for the future. The common fear is that increasing value requires a massive renovation budget.
But here in Prescott, where the market values charm and character just as much as square footage, you don’t need to tear down walls to see a return on investment.
As a local realtor, I’ve walked through hundreds of homes across the Quad Cities. I’ve seen million-dollar properties sit on the market because they felt cold, and I’ve seen modest homes in Yavapai Hills or downtown Prescott start bidding wars because they felt right. The difference often comes down to small, strategic updates rather than expensive overhauls.
This guide will walk you through practical, wallet-friendly ways to make your home shine without draining your savings account.
First Impressions: Maximizing Prescott Curb Appeal
Prescott is famous for its natural beauty. From the pines of the national forest to the granite dells, our landscape does a lot of the heavy lifting. Your home’s exterior should complement that natural backdrop, not fight against it.
The Front Door Facelift
Your front door is the handshake of your home. If it’s faded, peeling, or outdated, it sets a negative tone before the buyer even steps inside.
- Paint: A gallon of high-quality exterior paint costs about $40. Choose a color that pops but still fits the neighborhood vibe—deep reds, sage greens, or navy blues work beautifully against the earth tones common in Arizona architecture.
- Hardware: Swap out that tarnished brass handle for a modern matte black or brushed nickel set. It’s a small detail that screams “updated.”
Pressure Wash the Grime Away
Our monsoon seasons can leave a layer of dust and mud on siding and driveways. Renting a pressure washer for a day is incredibly cheap. Blast away the dirt from your siding, walkways, and driveway. You will be shocked at how much newer your home looks just by being clean.
The Power of Paint and Light
Once inside, the goal is to make the space feel open, clean, and inviting. You don’t need to knock down walls to achieve this.
The “White Paint” Strategy
If your walls are still sporting the beige or dark yellow trends of the early 2000s, it’s time for a change. A fresh coat of paint is widely considered the best ROI (Return on Investment) you can get.
- Go Bright: Stick to warm whites or very light greys. These colors reflect light, making rooms feel larger and airier—perfect for capturing that famous Arizona sunshine.
- Uniformity: Using one consistent color throughout the main living areas creates a flow that makes the square footage feel more substantial.
Update Light Fixtures
Builder-grade “boob lights” date a home instantly. You can find stylish, modern fixtures at hardware stores for under $50 each. Focus on the entryway, the dining area, and the kitchen. Replacing old, yellowing bulbs with “daylight” or “soft white” LEDs also significantly brightens the space for just a few dollars.
Kitchens and Baths: The Mini-Refresh
Everyone knows kitchens and bathrooms sell homes. Everyone also knows they are the most expensive rooms to renovate. The trick is to update them without actually renovating them.
Cabinet Rehab
If your cabinets are structurally sound but look dated (hello, honey oak), don’t replace them. Paint them. White or light grey cabinets can transform a dark kitchen into a modern culinary space. Add new hardware handles and pulls to finish the look.
The Backsplash Upgrade
You can install a peel-and-stick backsplash over a weekend for a fraction of the cost of real tile. Technology has come a long way, and many of these products look like the real deal. A simple subway tile look is timeless and appeals to almost every buyer.
Deep Clean the Grout
In bathrooms, dirty grout lines make the whole room feel dingy. Use a grout pen or a heavy-duty cleaner to whiten those lines. It makes the tile work look brand new.
Create an Outdoor Living Space
We have amazing weather for most of the year. Even a small patio can become a selling point.
- Staging: Set up a simple bistro table and two chairs on your back porch.
- Lighting: String up some solar cafe lights.
- The Hook: Help the buyer visualize drinking their morning coffee while watching the sunrise over Thumb Butte. If you can help them picture the lifestyle, the home sells itself.
Declutter Like a Pro
Decluttering costs literally zero dollars, but it offers the highest return. Prescott buyers often value a sense of peace and openness. Clutter creates anxiety.
- The 50% Rule: Aim to remove 50% of the items from your shelves and closets. Pre-pack them in boxes.
- Depersonalize: Take down the wall of family photos. You want buyers to picture their family there, not yours.
Smart DIY Maintenance
Finally, address the small annoyances that make buyers worry about deferred maintenance.
- Fix Leaky Faucets: A dripping tap signals neglect.
- Lubricate Squeaky Doors: A silent door feels solid and high-quality.
- Tighten Loose Handles: Wobbly cabinet knobs are a subconscious turn-off.
Boosting your home’s value doesn’t require a second mortgage. It requires elbow grease, a little creativity, and an understanding of what buyers in our beautiful mountain town are looking for. By focusing on curb appeal, lighting, and cleanliness, you can maximize your sale price and move on to your next adventure with confidence.
Are you thinking about selling your home in the Prescott area?
Let’s chat about which specific updates will get you the best return in your specific neighborhood.
Kim Shaw
(928) 710-9148
Your Guide to a Successful Final Walk-Through

You’ve navigated the offers, inspections, and mountains of paperwork. Now, the finish line is in sight: closing day. But before you get the keys to your new home, there’s one last, crucial step—the final walk-through. This is your last opportunity to ensure the property is in the condition you agreed upon. Think of it as a final check-in to protect your investment and ensure a smooth transition into homeownership.
This guide will walk you through what to expect, what to look for, and how to handle any issues that may arise. We’ll cover everything from verifying repairs to testing systems so that you can approach your final walk-through with confidence.
What is a Final Walk-Through?
A final walk-through is precisely what it sounds like: a last chance for you and your agent to visit the property before the closing appointment. It typically takes place 24 to 48 hours before you sign the final documents. The purpose is not to conduct a new inspection or renegotiate the contract, but to confirm that the home is in the same condition it was in when you agreed to buy it and that all contractual obligations have been met.
This step is essential. It protects you from any surprises after the sale is complete, when resolving issues becomes much more difficult and costly.
The Walk-Through Checklist: What to Focus On
Going into the walk-through with a plan is the best way to ensure you don’t miss anything. While every home is different, there are several key areas you should always examine.
1. Check for Completed Repairs
If your purchase agreement included seller-paid repairs following the home inspection, the final walk-through is your chance to verify they were done correctly.
- Bring the paperwork: Have a copy of the repair agreement or addendum with you.
- Inspect the work: Carefully examine each repaired item. Look for signs of quality workmanship. For example, if a leaky faucet was fixed, turn it on and check underneath the sink for any drips.
2. Test Appliances and Systems
Don’t assume everything is working just because it was a few weeks ago. Take the time to test all major systems and appliances that are included in the sale.
- HVAC: Turn on the heat and air conditioning, even if it’s for just a few minutes, to ensure both are functioning.
- Plumbing: Run all faucets (hot and cold), check for water pressure, and look for leaks under sinks. Flush every toilet.
- Electrical: Flip every light switch on and off. Test a few outlets with a phone charger or a small outlet tester to confirm they have power. Don’t forget ceiling fans, garage door openers, and the doorbell.
- Appliances: Run the dishwasher for a few minutes, turn on the stove burners, and check the oven. Ensure the refrigerator and freezer are cold. Test the garbage disposal, microwave, and any other included appliances.
3. Verify Property Condition
The seller is generally required to leave the property in “broom-swept” condition, meaning all personal belongings, furniture, and trash have been removed and the floors have been swept.
- Look for damage: Check walls, floors, and ceilings for any new damage that may have occurred during the move-out process, such as scuffs, scratches, or holes.
- Confirm included items are present: Your contract specifies which items are included in the sale (e.g., specific light fixtures, window treatments, or appliances). Make sure nothing has been swapped out or removed.
- Check outside: Walk around the exterior of the property. Ensure that any agreed-upon landscaping remains intact and that no debris or trash is left behind.
4. Ensure the Home is Vacant and Clean
The home should be empty of all the seller’s personal property. Open all closets, cabinets, and storage spaces—including the attic, basement, and garage—to make sure they are clear. While the standard is “broom-swept,” some sellers will leave the home in a much cleaner condition. However, your primary concern is that it’s empty and free of debris.
What to Do If You Find an Issue
Finding a problem during the final walk-through can be stressful, but it’s essential to remain calm. This is why you have a real estate agent by your side.
First, document everything. Take photos or videos of any issues you discover. Then, immediately notify your agent. We will contact the seller’s agent to discuss the problem and determine a solution.
Depending on the issue, there are a few common outcomes:
- Delay closing: For significant issues, it may be necessary to delay the closing until the seller resolves the problem.
- Hold back funds: An agreement can be made to hold a portion of the seller’s proceeds in an escrow account until the repair is completed after closing.
- Negotiate a credit: The seller may agree to provide you with a credit at closing to cover the cost of the repair yourself.
The goal is to find a fair and reasonable solution that allows the closing to proceed without leaving you responsible for unexpected costs.
Your Final Step Before Homeownership
The final walk-through is a vital part of the home-buying process. It’s your last chance to ensure you are getting precisely what you paid for. Remember to bring your contract, the repair agreement, a notepad, a phone for photos, and a checklist to keep you on track.
As your agent, I will be there with you every step of the way, helping you check every detail and addressing any concerns that arise. Communicating promptly is key. By being thorough and proactive, you can sign your closing documents with peace of mind and be ready to enjoy your new home. Call me today! Kim Shaw 928-710-9148
Enjoy Granville, Prescott Valley
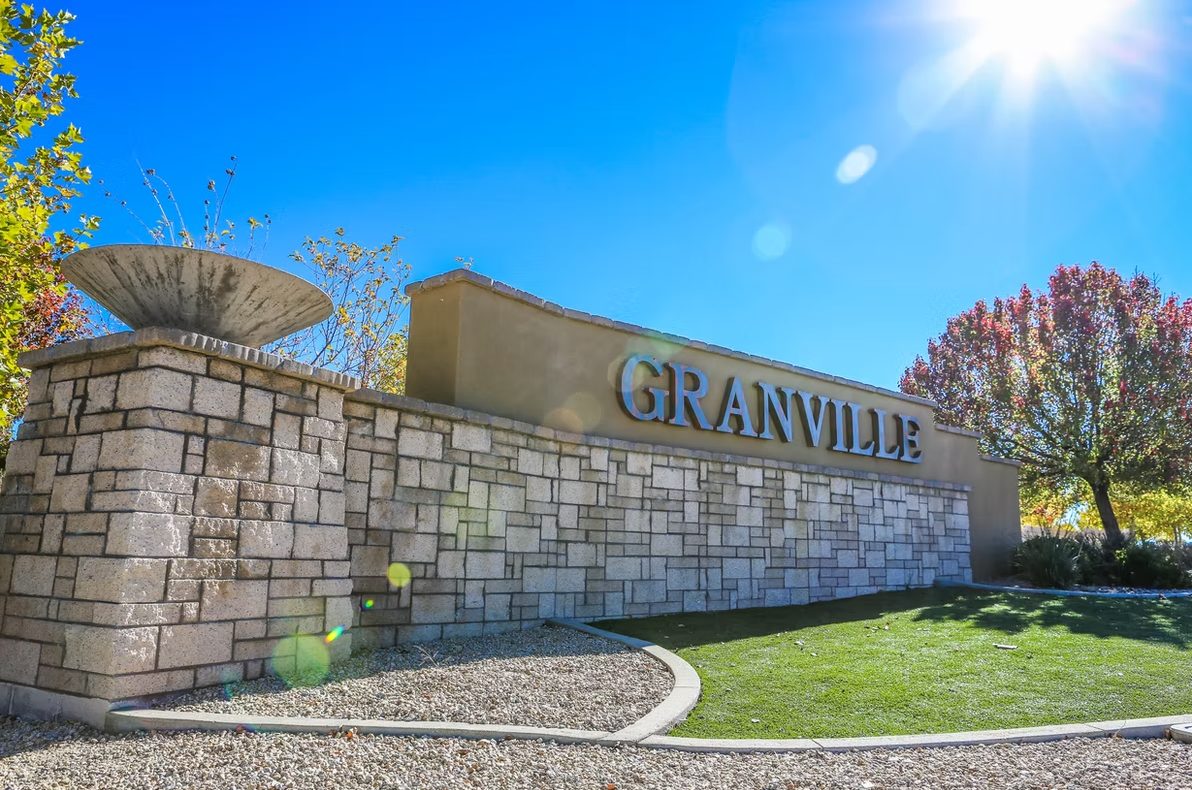
Granville is Thriving
Granville, a thriving subdivision in Prescott Valley, Arizona, offers a perfect blend of modern living and small-town charm. Nestled amidst the scenic beauty of northern Arizona, this community is known for its well-maintained homes, family-friendly atmosphere, and a strong sense of community. Residents enjoy access to a variety of amenities, including multiple clubhouses, fitness centers, swimming pools, and walking trails, making it an ideal place for an active lifestyle. The neighborhood’s convenient location provides easy access to local schools, shopping centers, and dining options, while its proximity to Prescott’s historic downtown and outdoor recreational areas adds to its appeal. With its welcoming vibe and picturesque surroundings, Granville is a sought-after destination for families, retirees, and anyone seeking a vibrant yet peaceful place to call home.
According to the HOA website (Granvilleaz.com), the homes in Granville range from 1,070 to 3,682 square feet. The current builder in Granville is Universal Homes. You can see samples of the homes in Granville on the Universal Homes website: Universalhomesaz.com/granville
Check out homes for sale in Granville on the up-to-date list Here
About Prescott Valley
Prescott Valley, Arizona, is a welcoming, family-focused community nestled at an elevation of 5,000 feet, just 85 miles north of Phoenix.
Known for its thriving economic development, Prescott Valley draws popular retailers and restaurants such as Kohl’s, Dick’s Sporting Goods, T.J. Maxx, Sprouts, Culver’s, Chick-fil-A, and Buffalo Wild Wings, along with a variety of unique local dining and shopping options.
When it comes to leisure, there’s no shortage of activities to enjoy. From exploring Fain Park and cooling off at Mountain Valley Splash Pool to attending vibrant events like Prescott Valley Days, Balloon Glow, and the festive Christmas Valley of Lights, there’s something for everyone year-round.
With its strong work ethic, excellent schools, family-centered values, and beautiful weather, Prescott Valley has become a top choice for families and retirees looking to settle down. It’s easy to see why we’re so passionate about Prescott Valley!
About Kim
Kim moved to Prescott in 1995 and started her Real Estate career in 1998. As a mother of four and a veteran of 5 corporate relocations, Kim brings a world of understanding and expertise into making a new town and a new house into a new home. Kim’s personalized and comprehensive service, complete support for her clients, and superior service are key to her successful 20 years of thriving in Prescott Real Estate. Kim’s Testimonials Speak Volumes
Faster. Higher. Better.
Kim works hard to sell your home faster, at a higher price, and to provide a better experience. The secret is simple . . . dedicated customer service. With all the changes in the real estate business, one thing has remained constant: Kim has never wavered in her commitment to client satisfaction. Kim has assembled a dedicated team of professionals who have closed 100% of the short sales we have listed.
Our team of agents, lenders, and marketing professionals works to ensure that your goal, whether purchasing or selling a home, is reached. Whether working with buyers in new home sales, retirees downsizing, or first-time home buyers navigating the home-buying process, Kim will work tirelessly to ensure a smooth transaction. Sellers benefit from Kim’s years of experience in Prescott and her dedication to helping them reach their goals.
Prescott draws visitors from all over the world to enjoy our unique setting, Old West history, and pleasant climate. Throughout the year, Prescott offers a variety of events and activities, so no matter when you visit, you’ll have a chance to experience the many faces of our wonderful town. Prescott has the most diverse terrain and topography, offering homes with 100-mile views or those nestled in the high pines. Prescott truly is everyone’s hometown.
Kim Shaw
(928) 710-9148
A Guide to Building Net Worth Through Homeownership

Deciding where to live is one of the biggest financial choices you’ll ever make. The “rent vs. buy” debate is a constant topic, and both sides have valid points. While renting offers flexibility, homeownership provides a powerful, time-tested path to build long-term wealth. For many families, a home isn’t just a place to live—it’s the cornerstone of their financial security and a key driver in growing their net worth.
The Foundation of Wealth: Building Home Equity
When you pay rent, that money is gone forever. It covers your housing for the month, but it doesn’t build any value for you. When you own a home, a portion of your monthly payment goes toward creating something you own: equity.
How Equity Works: A Two-Part Engine
Home equity is the difference between your home’s market value and the amount you owe on your mortgage. It grows in two primary ways:
- Principal Paydown: With each mortgage payment, you pay down the principal balance of your loan. In the early years, most of your payment goes to interest. However, over time, more and more of it erodes the loan itself. This is a form of “forced savings” that builds your ownership stake month after month.
- Market Appreciation: Real estate has historically appreciated over time. This increase is called appreciation. While not guaranteed and subject to market fluctuations, long-term appreciation is a significant contributor to building wealth through real estate.
A Simple Example: Watching Your Equity Grow
Let’s imagine you buy a home for $400,000 with a 20% down payment ($80,000). You take out a mortgage for the remaining $320,000.
- Day 1: Your equity is $80,000 (your down payment).
- After 5 Years: Let’s say your home appreciates at a modest 4% per year. Its value could rise to approximately $486,660. Meanwhile, you’ve paid down your mortgage principal to roughly $290,000.
- Your new equity: $486,660 (home value) – $290,000 (loan balance) = $196,660.
In just five years, your initial $80,000 investment has more than doubled, without you doing anything other than making your regular monthly payments. A renter in a similar property would have spent that time paying their landlord with no assets to show for it.
The Power of Leverage in Real Estate
One of the most potent wealth-building aspects of homeownership is leverage. When you buy a home, you control a significant asset with a relatively small upfront investment (your down payment). You then benefit from the appreciation of the entire asset, not just the cash you put in.
Let’s revisit our example. Your $80,000 down payment controls a $400,000 asset. If the home’s value increases by 4% in one year ($16,000), your return on your cash investment isn’t 4%. It’s a whopping 20% ($16,000 gain / $80,000 cash invested). This compounding effect over many years is what makes homeownership such an effective way to build net worth.
Potential Tax Benefits
The U.S. tax code often provides incentives for homeowners. While you should always consult a tax professional for advice specific to your situation, two common benefits include:
- Mortgage Interest Deduction: You may be able to deduct the interest you pay on your mortgage from your taxable income, which can lower your annual tax bill.
- Capital Gains Exclusion: When you sell your primary residence, you may be able to exclude a significant amount of the profit from capital gains taxes ($250,000 for single filers, $500,000 for married couples filing jointly), provided you meet certain ownership and use requirements.
A Hedge Against Inflation
Rent prices tend to rise with inflation. If you’re a renter, you’re at the mercy of annual rent hikes that can strain your budget.
When you secure a fixed-rate mortgage, your principal and interest payment is locked in for the entire loan term—often 15 or 30 years. Your loan payment doesn’t change, even if rents in your area are soaring. This provides valuable budget stability and acts as a powerful hedge against inflation, allowing you to keep your largest monthly expense predictable.
Common Mistakes to Avoid on the Path to Homeownership
Buying a home is a great way to build net worth, but it’s not without risks. Avoiding these common mistakes is crucial for success.
- Overbuying: Purchasing a home that stretches your budget too thin can lead to financial stress and prevent you from saving for other goals. A common rule is to keep your total housing costs (mortgage, taxes, insurance) below 28-30% of your gross monthly income.
- Ignoring the Total Cost of Ownership: The mortgage payment is just the beginning. You must also budget for property taxes, homeowners insurance, maintenance, repairs, and potential HOA fees.
- Having a Short Time Horizon: The financial benefits of homeownership, like equity growth and appreciation, take time to materialize. If you plan to move in just a few years, renting might be the smarter financial choice, as transaction costs (closing costs, agent commissions) can eat up any potential gains.
When Does Renting Make More Sense?
Despite the advantages of buying, homeownership isn’t for everyone. Renting is often the better choice in several scenarios:
- You need flexibility: If your career requires frequent moves or you’re unsure where you want to settle down.
- You’re in a high-cost-of-living area: In some markets, the cost to buy is so high that it makes more financial sense to rent and invest the difference.
- You haven’t saved enough: Lacking funds for a down payment and an emergency fund can make homeownership a risky proposition.
- You prefer a low-maintenance lifestyle: If you don’t want the responsibility of repairs and upkeep, the simplicity of renting is a major benefit.
Take the Next Step
Building net worth through homeownership is a long-term strategy, not a quick way to get rich. It requires careful planning, financial discipline, and a realistic outlook. By understanding how home equity works and avoiding common pitfalls, you can put your family on a solid path toward financial independence.
If you’re ready to explore your options, give me a call. We can work together to find the best path to homeownership for you. Kim Shaw, Better Homes and Gardens BloomTree Realty (928) 710-9148.
How to Select a Mortgage Lender: A Practical Guide

Buying a home is one of the most significant financial decisions you’ll ever make, and choosing the right mortgage lender is a critical part of the process. The lender you select can impact your interest rate, fees, and overall experience for years to come. This guide will walk you through everything you need to know to compare lenders confidently and find the perfect partner for your homebuying journey.
You will learn about the different types of lenders and how to decipher loan terms. By the end, you’ll have a clear, step-by-step plan to select a mortgage lender that fits your needs.
Understanding the Players: Types of Mortgage Lenders
Your first step is to understand where you can get a mortgage. Each type of lender has its own advantages and disadvantages.
Banks and Credit Unions
These are depository institutions where you might already have a checking or savings account. Banks range from large, national chains to smaller, local community banks. Credit unions are not-for-profit organizations owned by their members.
- Pros: Often offer relationship discounts to existing customers. They have a physical presence, which can be reassuring.
- Cons: May have stricter lending criteria and fewer loan options than specialized lenders.
Mortgage Brokers
A mortgage broker is an intermediary who works with multiple lenders to find a loan for you. They don’t fund the loan themselves but act as a matchmaker.
- Pros: Can save you time by shopping multiple lenders at once. May have access to wholesale rates not available to the public.
- Cons: Their compensation comes from either you or the lender, which can sometimes influence their recommendations.
Online and Nonbank Lenders
This category includes companies that specialize solely in making mortgage loans. Many operate entirely online, streamlining the application process.
- Pros: Often have competitive rates and lower fees due to lower overhead. The digital process can be fast and convenient.
- Cons: Customer service can be less personal. You may work with different people at each stage of the process.
Decoding the Financials: Key Loan Terms
When you start receiving quotes, you’ll be flooded with numbers and acronyms. Here’s what you need to focus on.
Interest Rate vs. APR
The interest rate is the cost of borrowing the principal loan amount, expressed as a percentage. The Annual Percentage Rate (APR) is a broader measure. It includes the interest rate plus other costs, such as lender fees and discount points, providing a more comprehensive view of the loan’s total cost. Always compare APRs when shopping.
Points, Fees, and Costs
- Discount Points: These are fees paid up front to the lender in exchange for a lower interest rate. One point equals 1% of the loan amount.
- Lender Fees: These are charges for the lender’s services, like origination, processing, and underwriting fees.
- Third-Party Costs: These are fees for services rendered by other companies, such as appraisal, title search, and credit report fees.
Pre-approval vs. Prequalification
Though they sound similar, they are very different. A prequalification is a quick estimate of how much you might be able to borrow, based on self-reported information. A pre-approval is a conditional commitment from a lender to give you a loan. It requires you to submit financial documents for verification and carries much more weight with sellers.
Choosing Your Product: Common Loan Types
Lenders offer a variety of loan products. The right one depends on your financial situation, credit score, and the amount of your down payment.
- Conventional Loan: Not insured by the government. Requires a good credit score and typically a down payment of at least 3-5%.
- FHA Loan: Backed by the Federal Housing Administration. Allows for lower credit scores and a down payment as low as 3.5%.
- VA Loan: For eligible veterans, active-duty service members, and surviving spouses. Often requires no down payment.
- USDA Loan: For low- to moderate-income borrowers in eligible rural and suburban areas. Also requires no down payment.
- Jumbo Loan: A loan that exceeds the conforming loan limits set by the FHFA. Used for financing more expensive homes.
Select Mortgage Lender
Reputation and Reviews
Do your homework. Look for online reviews on sites like Google and Zillow. Check the lender’s history through the Nationwide Multistate Licensing System (NMLS). You can also search for complaints against a lender in the Consumer Financial Protection Bureau (CFPB) complaint database.
Selection Checklist
Follow these steps to make an informed and confident choice.
- Get Pre-approved: Start with a pre-approval from at least one lender to know your budget.
- Shop Around: Apply with at least three different types of lenders (e.g., a bank, a credit union, and an online lender) to compare rates and terms.
- Compare Loan Estimates: Lay the official documents side by side and compare them line by line.
- Read Reviews: Check online reviews and search the NMLS and CFPB databases.
- Interview Loan Officers: Ask questions about their process, communication style, and closing timelines.
- Negotiate: Ask your preferred lender if they can match a competitor’s offer or reduce their fees.
- Lock Your Rate: Once you’ve made your decision, formally lock your interest rate.
When you are ready to start your homebuying process, call me. I will help you navigate the homebuying journey!


